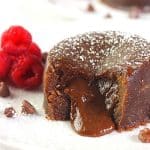
Easy Instant Pot Chocolate Lava Cakes
These Easy Instant Pot Chocolate Lava Cakes are served warm and have rich, silky-smooth molten chocolate centers. They're a perfect dessert for special occasions!
Servings: 2
Estimated Calories: 763
Ingredients
- cooking spray
- 4 tablespoons salted butter
- ½ cup milk chocolate chips, or semi-sweet chocolate chips
- ½ cup powdered sugar, plus a little extra for serving
- 2 large eggs, room temperature
- 1 teaspoon vanilla extract
- 4 tablespoons all-purpose flour
- extra chocolate chips, for garnish (optional)
- fresh raspberries, for garnish (optional)
Special Equipment
- 2 oven-safe ramekins (6 ounces each; 3½ inches in diameter)
- Instant Pot (6 or 8-quart; I used a 6-quart Duo Plus)
- trivet (comes with Instant Pot)
Instructions
- Pour 1½ cups of cold water into the Instant Pot and put the trivet in the pot.
- Spray the inside of two 6-ounce ramekins with cooking spray; set aside.If any cooking spray gets on the outside of the ramekins, wipe it off as best as you can so they aren't slippery.
- Put the butter and the chocolate chips in a small sauce pot (I use a 1-quart pot). Heat over low heat, stirring, just until completely melted (be careful not to overheat, as this can change the texture of the chocolate and the cake).Alternately, you can melt the butter and chocolate in the microwave instead of on the stove. Place them in a microwave-safe bowl and heat in 15-second intervals, stirring after each one, just until melted.
- Remove the pot from the heat and add the powdered sugar; stir until well-combined and smooth (the mixture will be thick at this point).
- Add the eggs and vanilla extract; stir until well-combined and smooth.
- Add the flour; fold it in just until it is incorporated (be careful not to overmix).
- Divide the batter evenly among the two prepared ramekins (they will be nearly full).
- Put the ramekins on the trivet in the Instant Pot.
- Put the lid on the Instant Pot and set the steam release knob to the "sealing" position.
- Cook on high pressure for 8 to 10 minutes (depending on how loose you like the center to be; I cook mine for 9 minutes for a thicker but still runny center, and I recommend starting here).It will take the Instant Pot approximately 8 minutes to come up to pressure before the cooking time will start counting down.
- When the cooking time has finished, turn the steam release knob to the "venting" position to quick-release the pressure. Then gently open the lid so as not to let water drip down on the cakes.They will be puffed up (possibly over the tops of the ramekins) when you first remove the lid but will quickly deflate once they are removed from the pot.The cakes should be well set around the edges and also look set in the center on the top but feel slightly soft when you gently press on them (if the center is very firm, they are likely overcooked). If the edges or top don't look set, put the lid back on the pot and pressure cook for another minute or two depending on how loose they are. Use a quick-release as before.
- Carefully remove the ramekins from the Instant Pot and place them on a clean kitchen towel; let rest for 2 to 3 minutes (I go for the full 3 minutes).Use oven mitts, a kitchen towel, tongs, or whatever tools you need to use to get them out of the pot. Not only will the ramekins be hot; they could also be slippery if any of the cooking spray got on the outside.Don't skip this step. If you try to take the cakes out of the ramekins too soon, they could break open.The cakes will continue to cook a bit as they sit in the ramekins, thickening up the center even more, so don't let them rest for much more than the 3 minutes.
- Run a knife between the edges of the cake and the ramekins to loosen (be very careful not to cut into the sides of the cake), then invert the ramekins onto serving plates.To do this, put the serving plate on top of the ramekin, serving side down, then carefully flip over. The cake should slide right out (if needed, give the ramekin a few gentle taps to loosen). Then lift the ramekin off of the cake. Use mitts for this step; those ramekins will still be hot!Alternately, you can serve the cakes right in the ramekins (a little less impressive, but still super delicious!).
- Sprinkle the cakes with powdered sugar. Garnish with extra chocolate chips and/or raspberries, if desired.
- Serve immediately while still warm.
Recipe Notes
- Use a sealing ring that doesn't have any strong smells. You don't want your cakes to have a hint of the stew, curry or other dish that you cooked last. I suggest buying an extra sealing ring that you use just for desserts and other non-smelly foods.
- Because of the small amount of flour compared to liquid ingredients and the moist cooking environment, these cakes do have a slightly different texture than a regular cake.
- All Instant Pots are different, and other factors (such as altitude, the amount and temperature of the water you use, and how loose you like your "lava"), can affect cooking times. For this reason, you may need to experiment a little to find the time that's perfect for you. Somewhere between 8 and 10 minutes should work in most cases. Once you figure it out, all else being equal, you should get consistent results every time.
- Wondering if it's safe to eat the "lava" inside the cakes? It is, as long as it reaches a temperature above 160°F (which it should). With a 9-minute cooking time, mine reached 170°F. You can always check yours with an instant-read thermometer to be sure (check as soon as you open the lid).
- To make 4 lava cakes instead of 2, double the ingredients and use 4 ramekins. You will need to stack the ramekins, 3 on the trivet and then 1 on top of them. The cooking time stays the same.
- To make a delicious Red Velvet version: Follow the recipe as written except use ¼ cup white chocolate chips and ¼ cup milk chocolate chips and add 1 to 1½ teaspoons of red food coloring to the batter (or however much is needed to get the color you want).
Tried this recipe? I'd love to see it!Take a photo, post it on Instagram, and mention @nowcookthis or tag #nowcookthisrecipes. Thanks!