
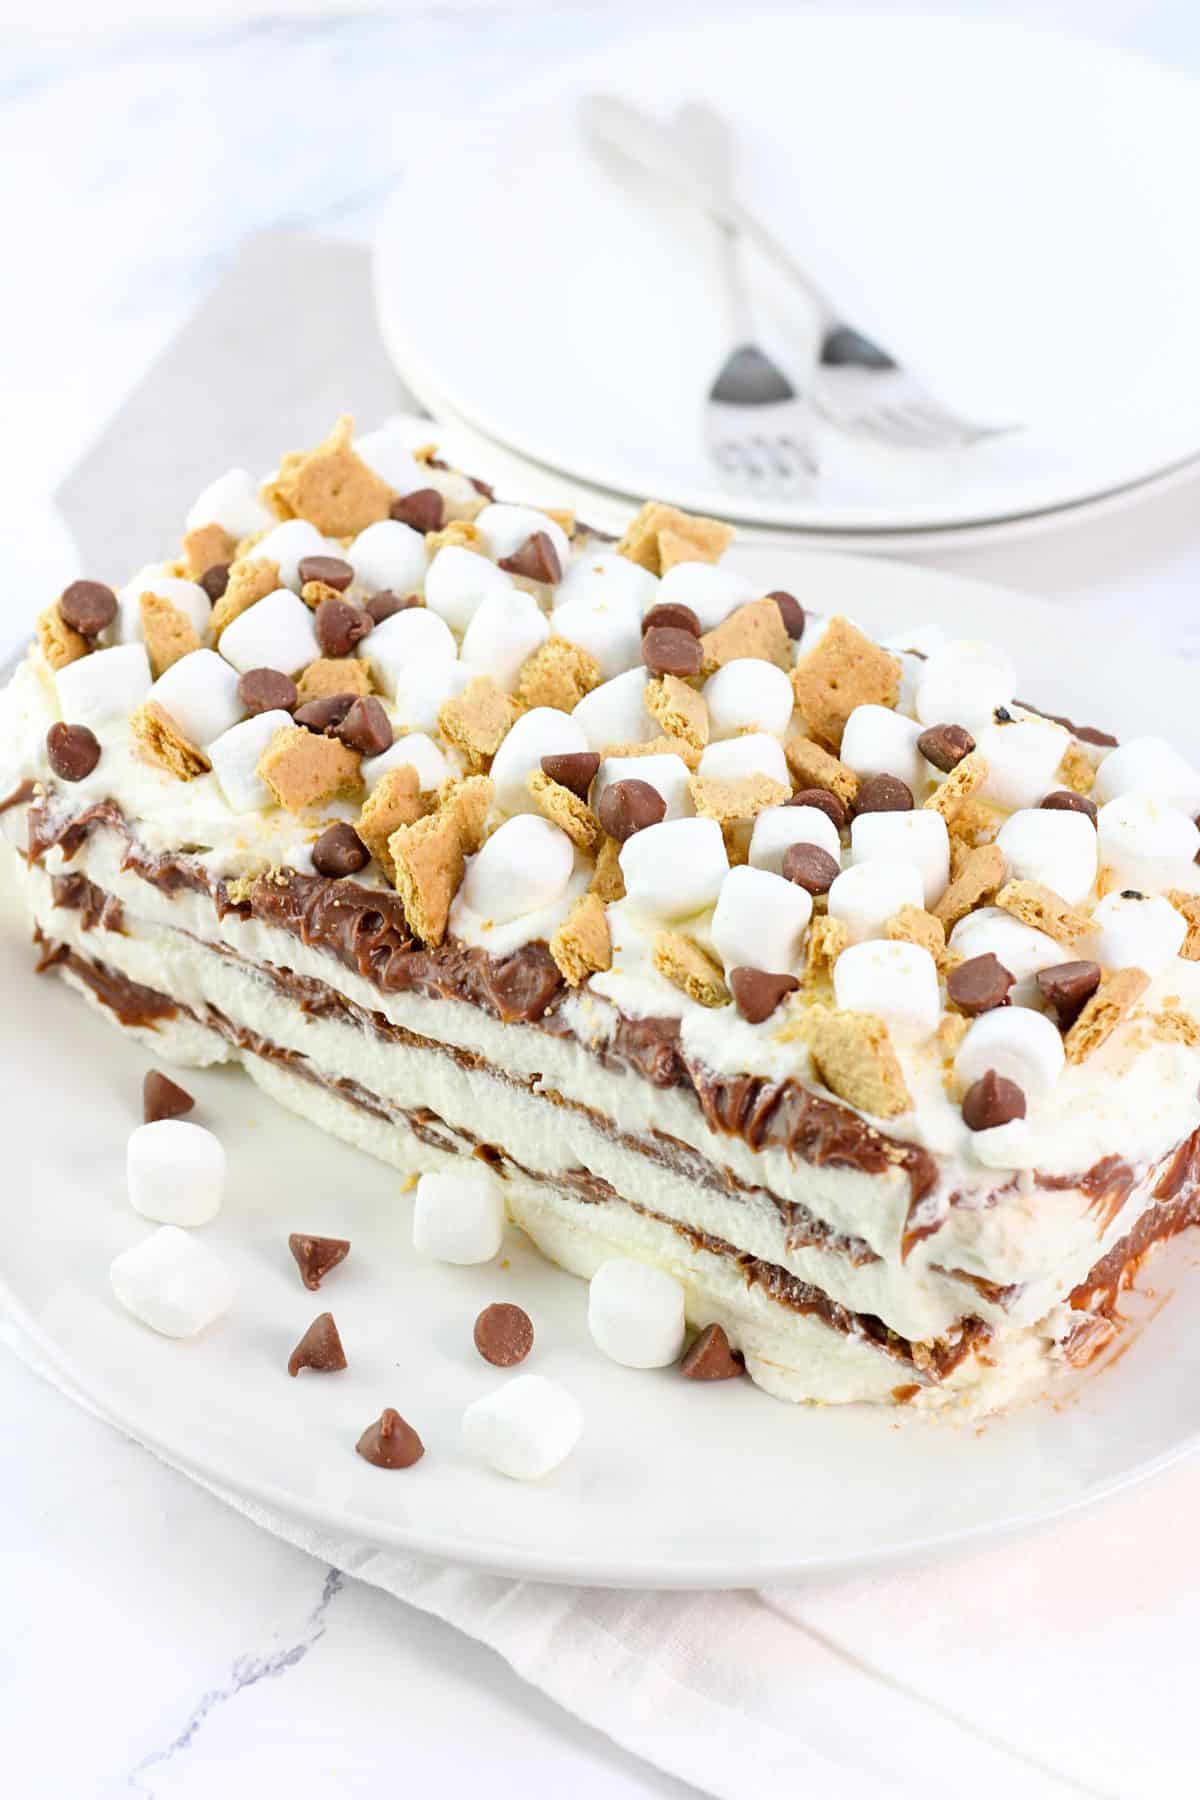
This easy S'Mores Icebox Cake has layers of graham crackers, silky chocolate ganache and fluffy marshmallow whipped cream. It's the perfect no-bake summer dessert that will have everyone coming back for s'more!

If you're a fan of the flavor of s'mores but want to serve a bit more of an elegant dessert, this s'more icebox cake recipe is a must-try. And there's no campfire needed!
Layer all of the components in a loaf pan, and then put it in the refrigerator (or "icebox," as early non-electric versions were called back in the day when this type of dessert originated).
This is where the magic happens. As it sits in the fridge, the whipped cream and chocolate ganache soften the graham crackers to make a cake-like consistency.
Heads Up! You'll need to plan ahead when making this dessert, because it needs to sit in the fridge for at least 8 hours...but it's absolutely worth the wait.
Love s'mores? Be sure to give my easy No-Bake S'Mores Treats a try too!
Jump to:
Why I Love This Recipe (and You Will Too!)
- You only need 7 simple ingredients, and that includes making homemade chocolate ganache and whipped cream.
- It's easy to prepare and assemble.
- The presentation is gorgeous, and the flavor is incredible (I think it's even better than traditional s'mores).
- It needs to be made ahead, so it's ready and waiting for dessert time.
- No-bake means there's no turning on the oven, which makes it a perfect summertime dessert...but you can make it any time of the year!
Ingredients & Notes
Here are all of the ingredients you need to make this Smores Icebox Cake, along with notes on some of the ingredients to help you make the best selections.

Ingredient amounts are in the recipe card below.
- Milk chocolate chips - the classic for s'mores, but you could use semisweet or even dark chocolate chips if that's what you prefer
- Heavy whipping cream
- Powdered sugar
- Vanilla extract - I use pure vanilla extract for the best flavor
- Marshmallow fluff - look for this near the peanut butter and jelly in the grocery store
- Graham crackers - I use classic honey graham crackers, but you can use any flavor that you like to use when you make s'mores
- Mini marshmallows
Substitutions & Variations
- Jarred hot fudge sauce (1½ cups) can be used instead of making the chocolate ganache (just don't make it hot).
- Store-bought whipped topping, such as Cool Whip, can be used instead of making whipped cream (you'll need 4 cups). Omit that portion of the heavy cream, the powdered sugar and the vanilla extract, and fold the marshmallow fluff into the topping until well combined.
- If you have a kitchen torch, you can lightly toast the marshmallows on top of the cake if you want.
How to Make S'Mores Icebox Cake
This is just a brief overview of the steps. For the full printable recipe with ingredient amounts and detailed instructions, go to the recipe card below.
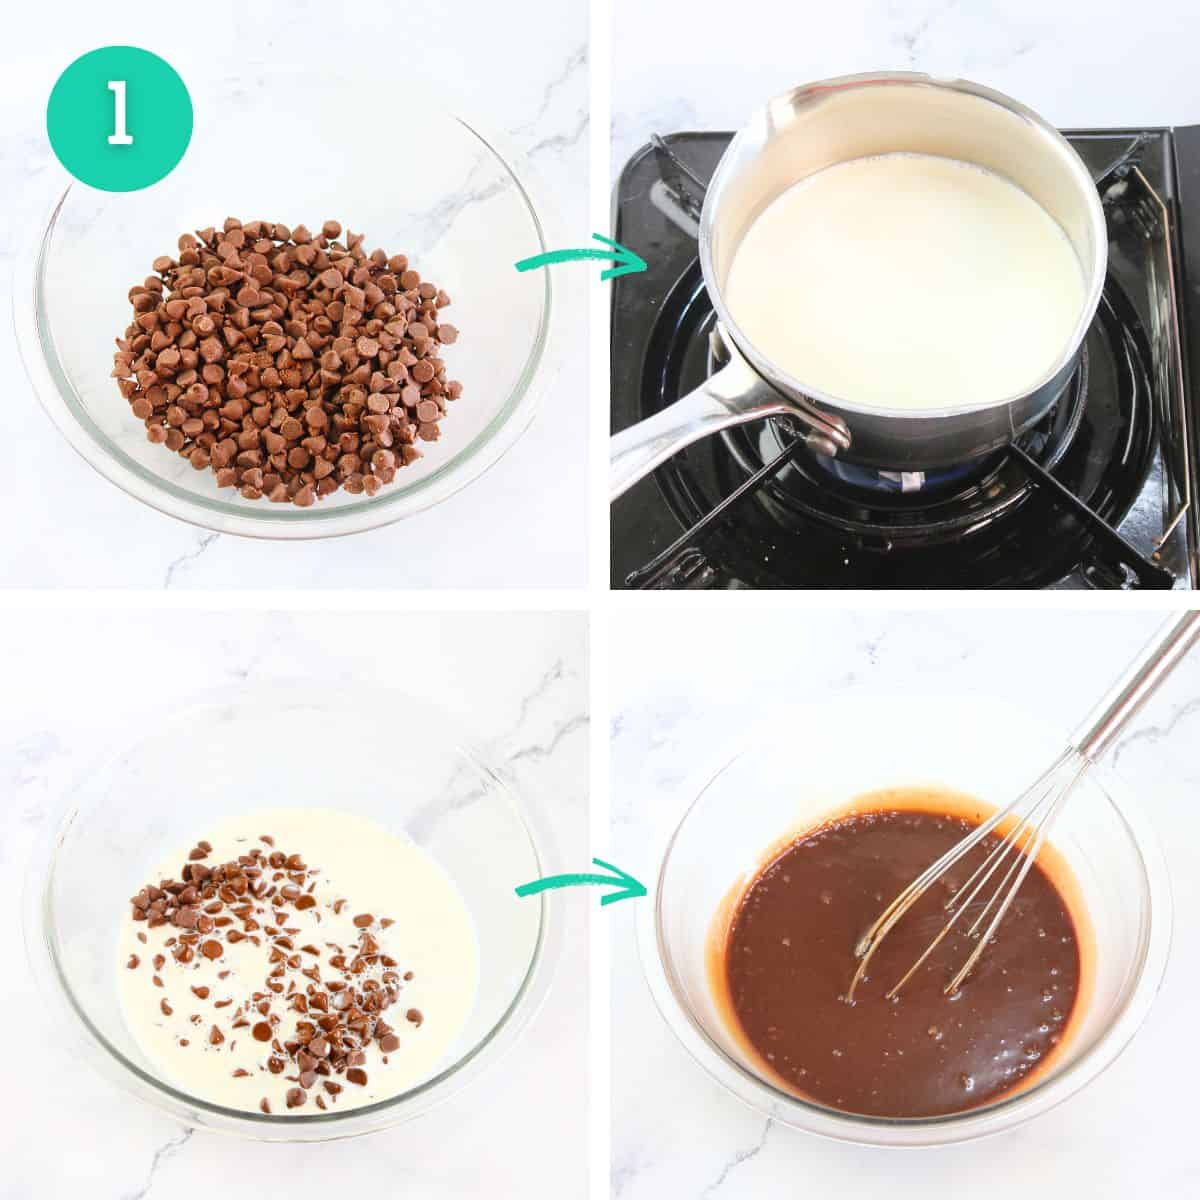
Make the Chocolate Ganache:
Place the chocolate chips in a large heat-proof bowl. Heat the heavy cream in a small saucepan over medium heat to a gentle simmer, then pour it into the bowl with the chocolate chips. Let sit for 1 minute, then whisk until well-combined and smooth. Refrigerate for 30 minutes.
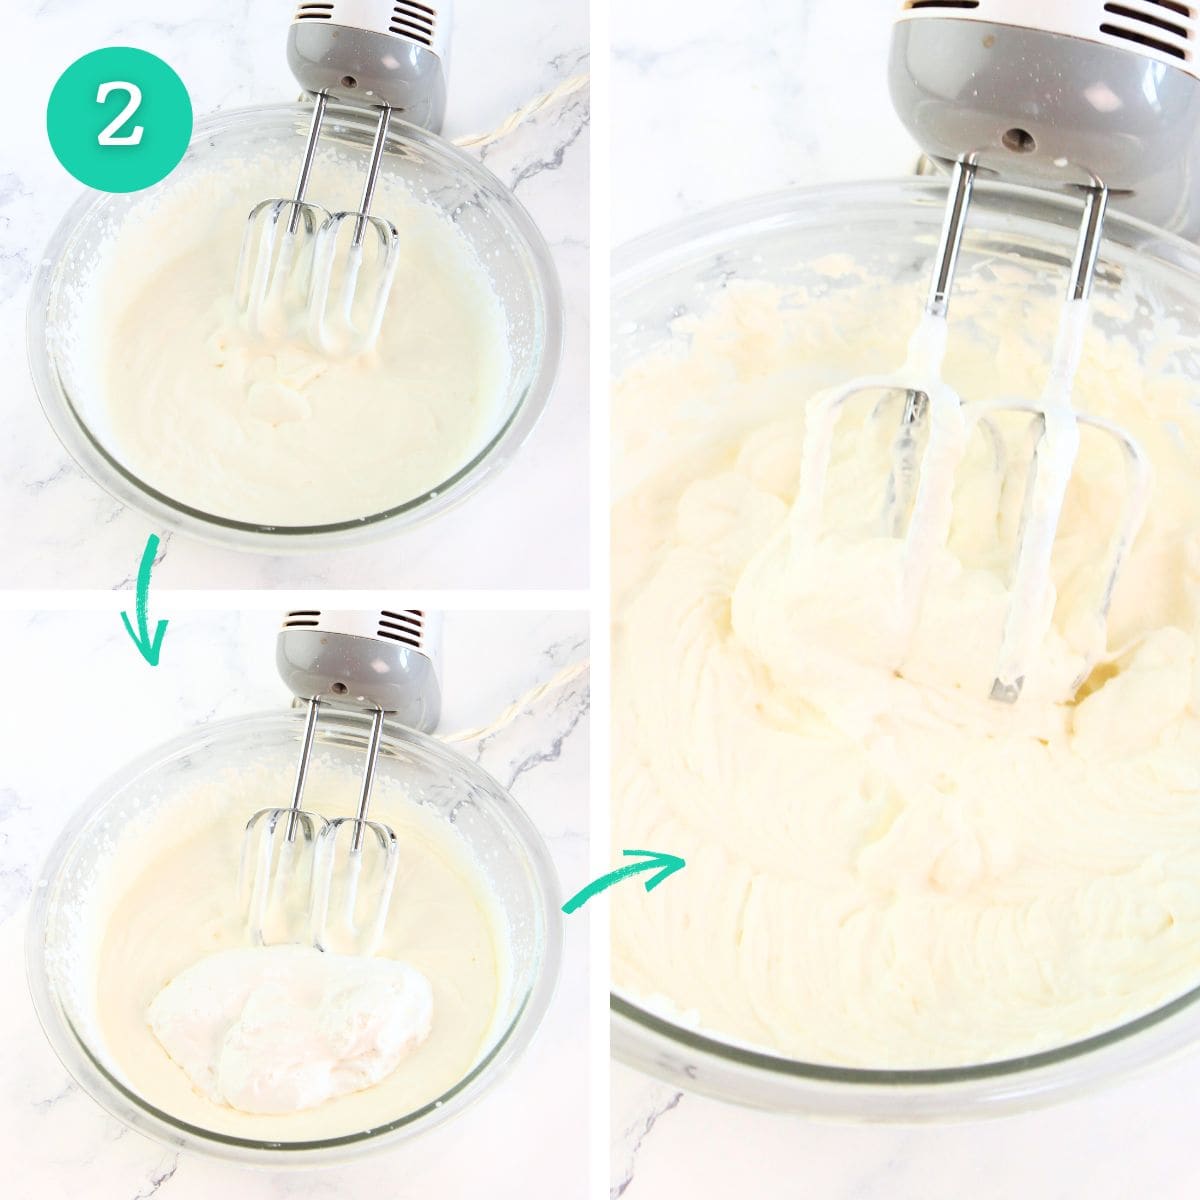
Make the Marhsmallow Whipped Cream:
In a large bowl, whip the heavy cream with an electric mixer to soft peaks. Add the marshmallow fluff and continue whipping to stiff peaks. Reserve and refrigerate 1 cup of the whipped cream for topping the cake later.
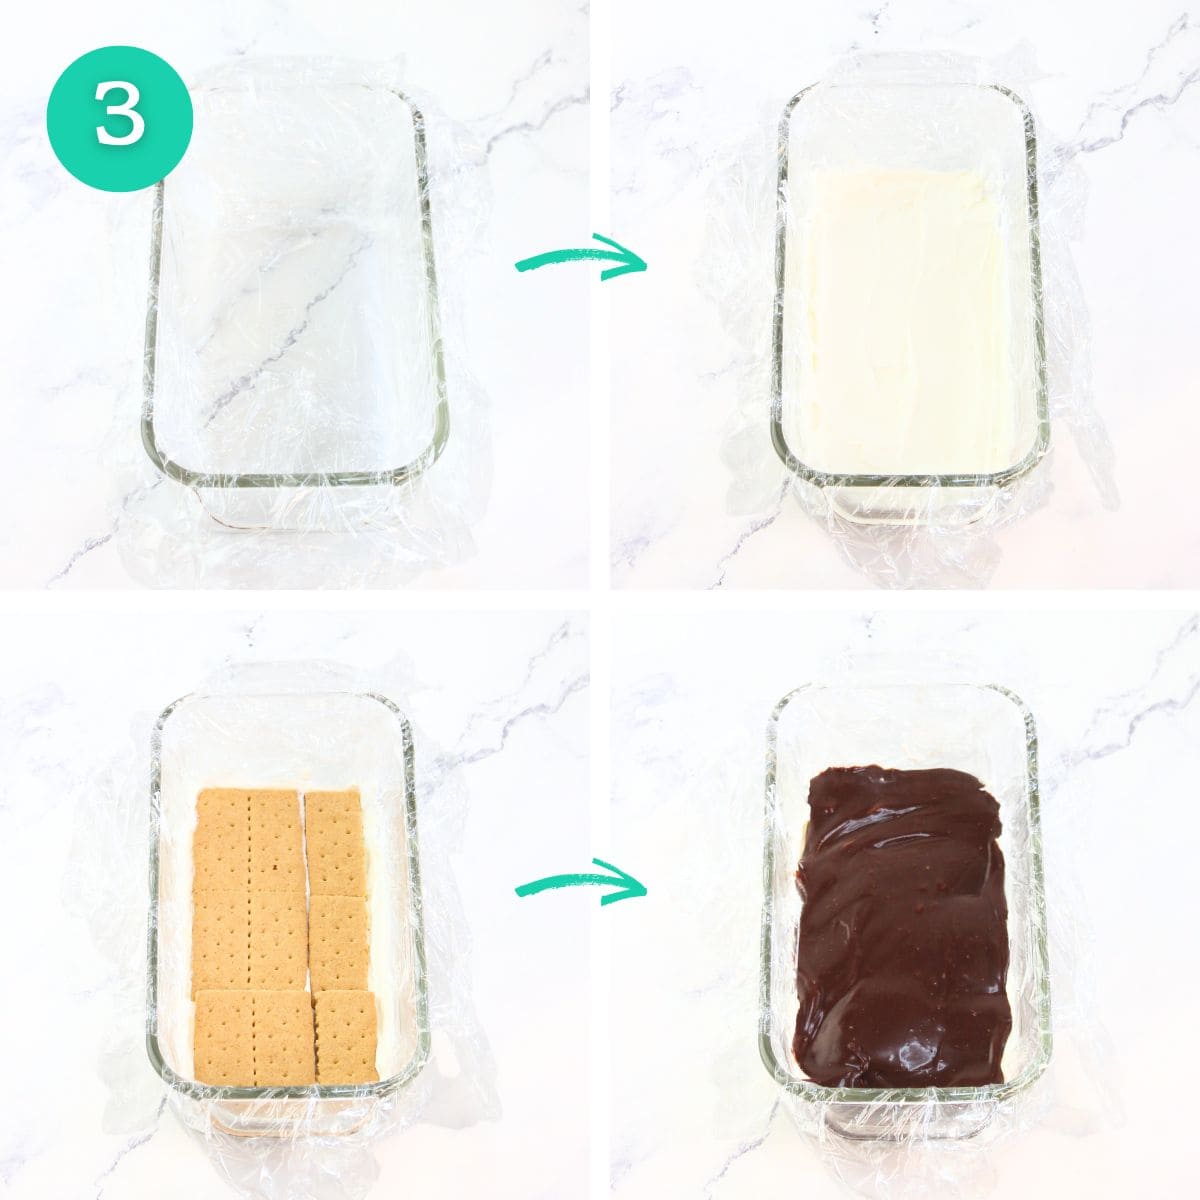
Line a loaf pan with plastic wrap, leaving about 3 inches extra to overhang each side. Spread ⅓ of the remaining whipped cream in the bottom of the pan. Cover the whipped cream with a single layer of graham crackers. Spread ⅓ of the chocolate ganache over the graham crackers.
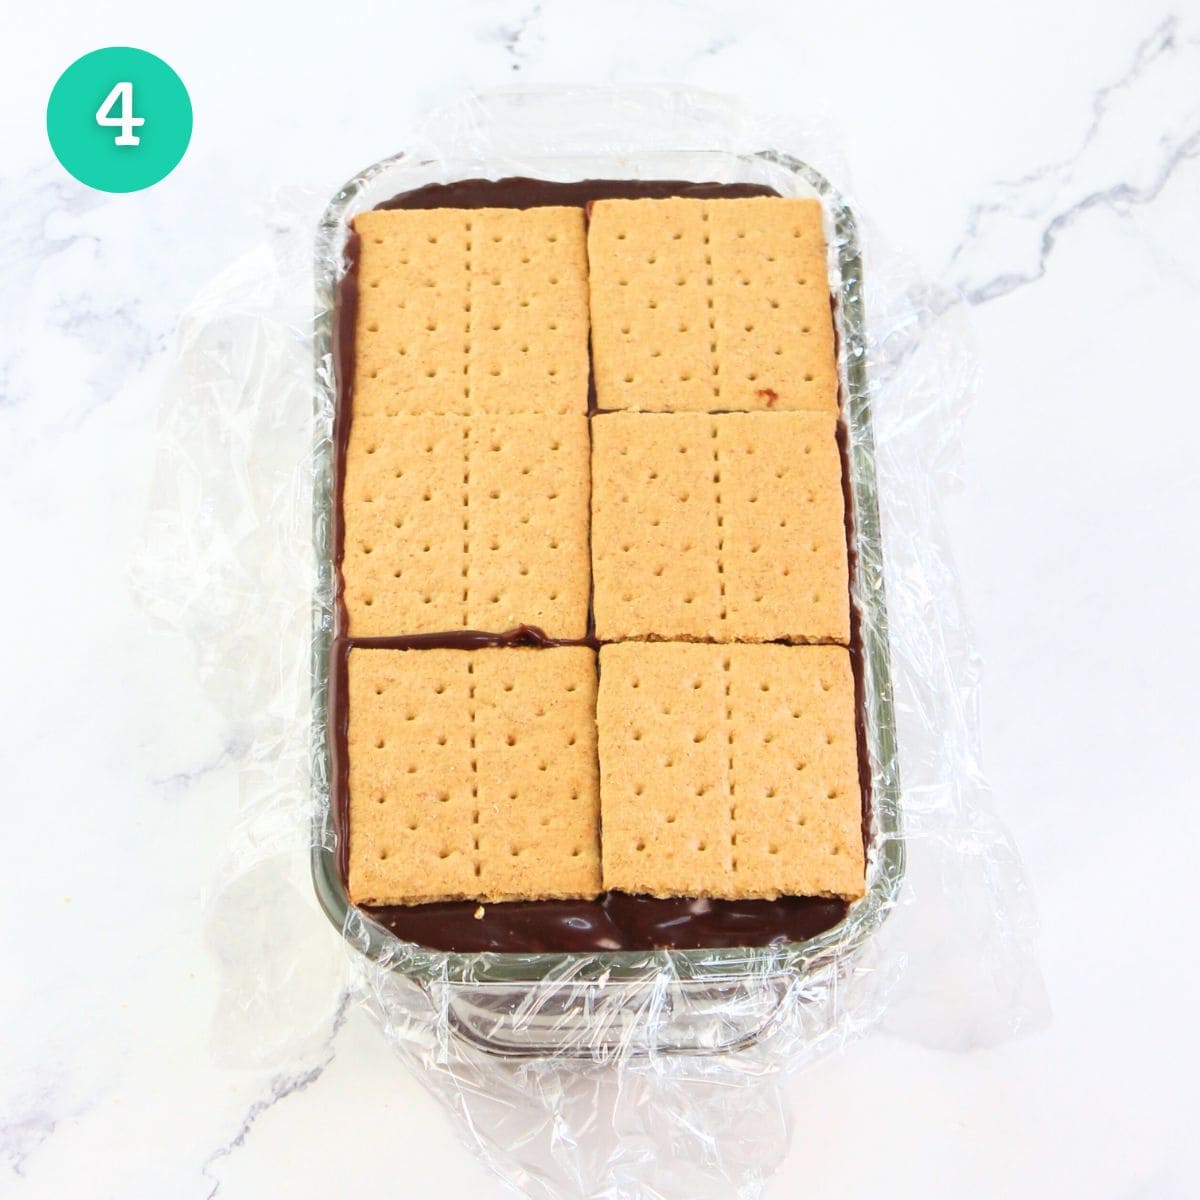
Repeat the layers 2 more times: whipped cream, graham crackers, ganache, whipped cream, graham crackers, ganache. Top with a layer of graham crackers. Use the excess plastic wrap to cover the top of the cake. Refrigerate for at least 8 hours.
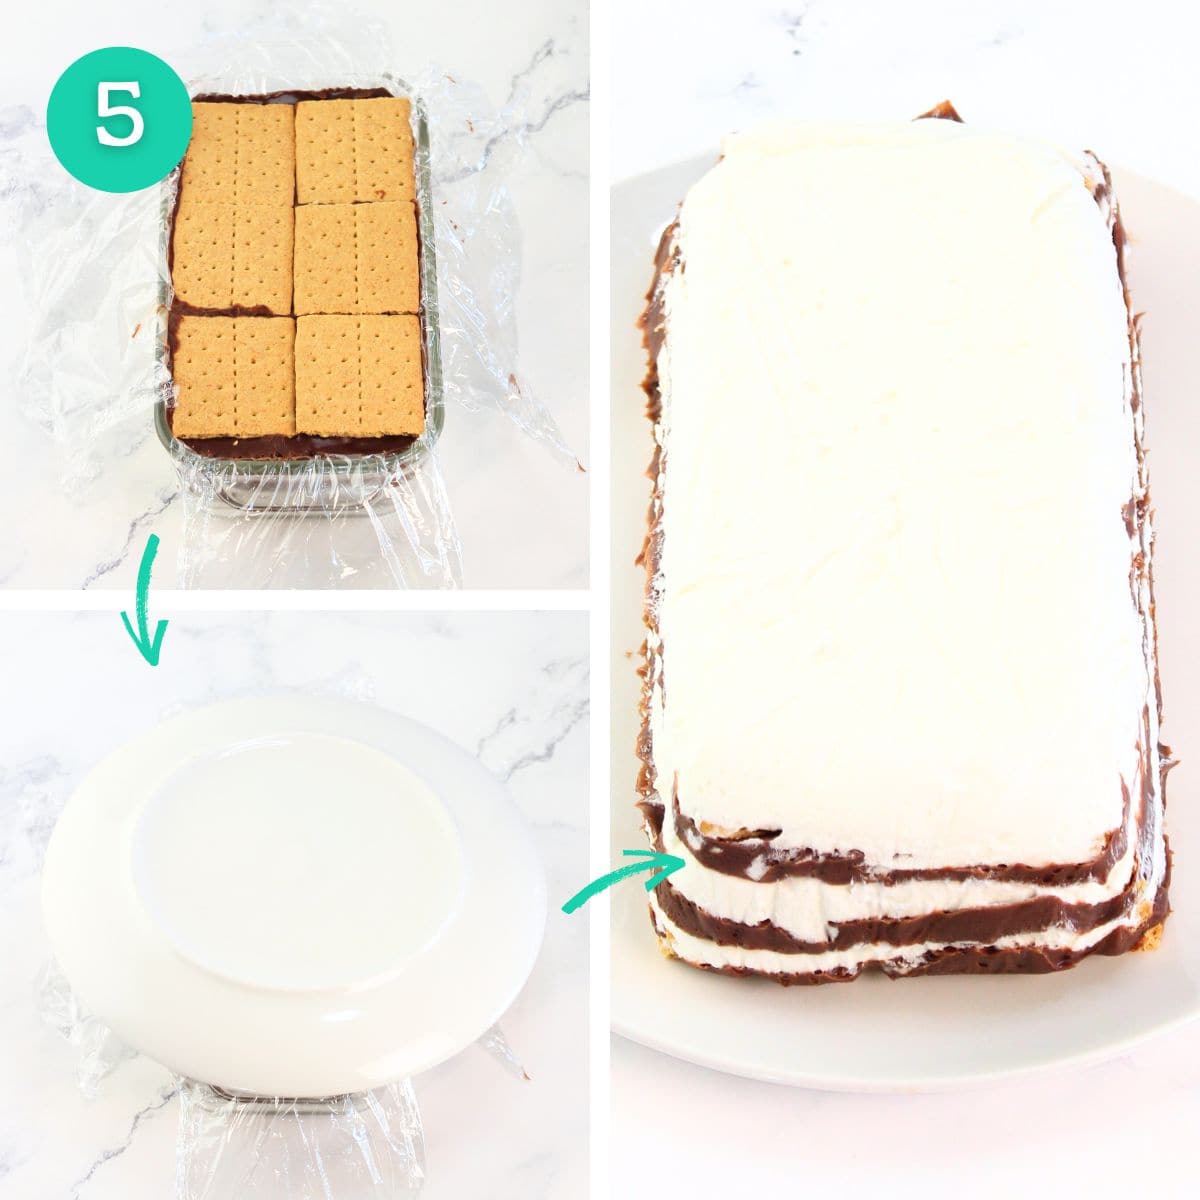
Unwrap the top of the cake. Place a serving dish over the top of the loaf pan, and invert the cake onto the dish. Remove the plastic wrap.
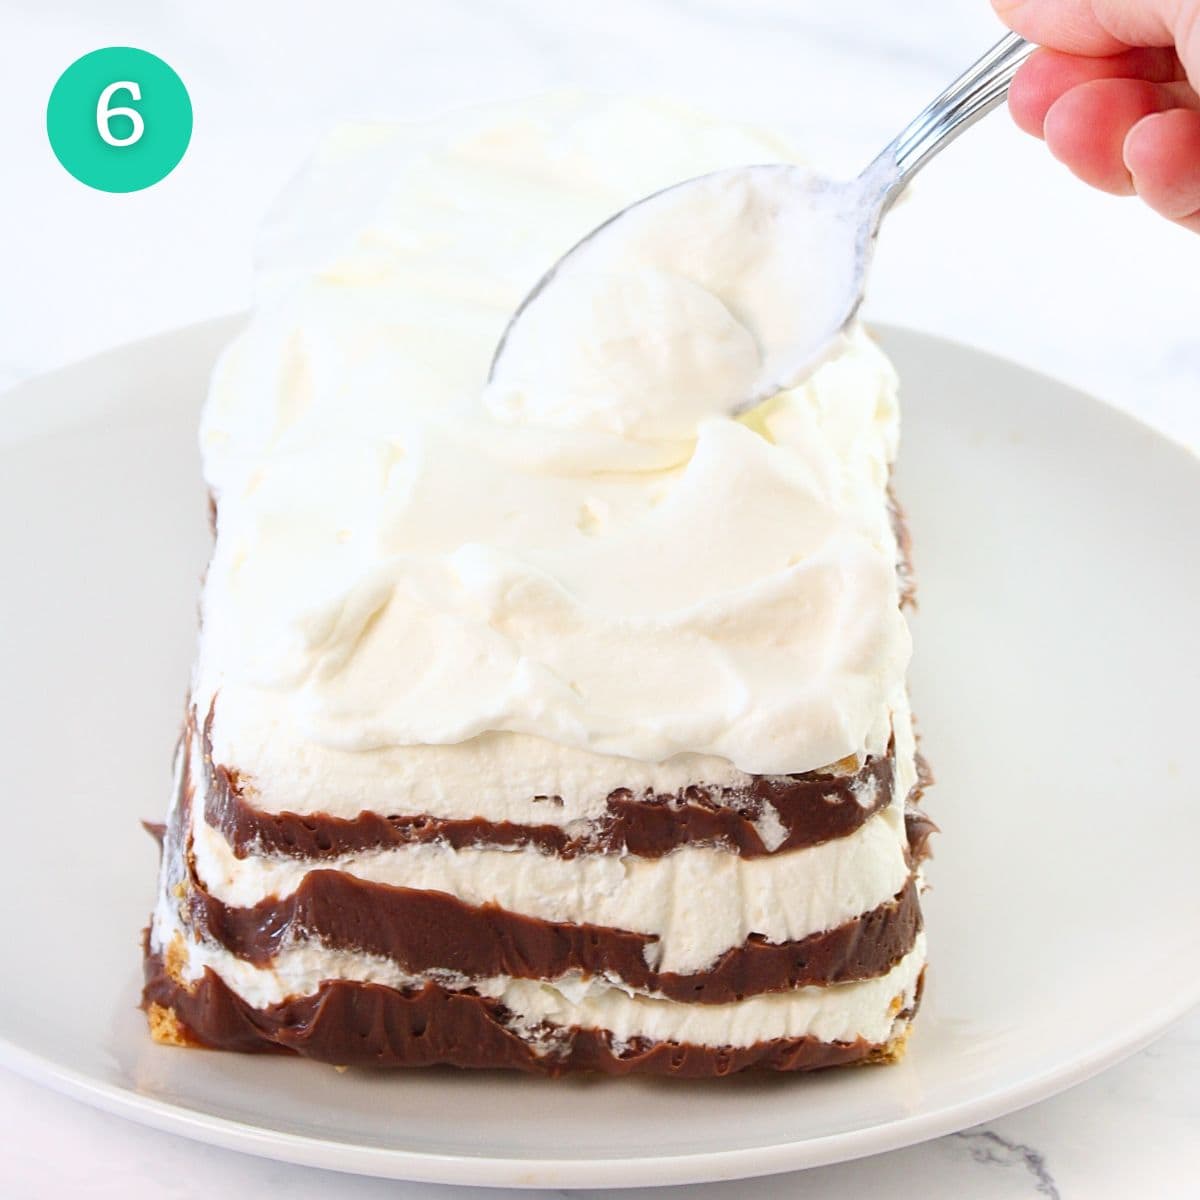
Spread the reserved marshmallow whipped cream over the top of the cake.
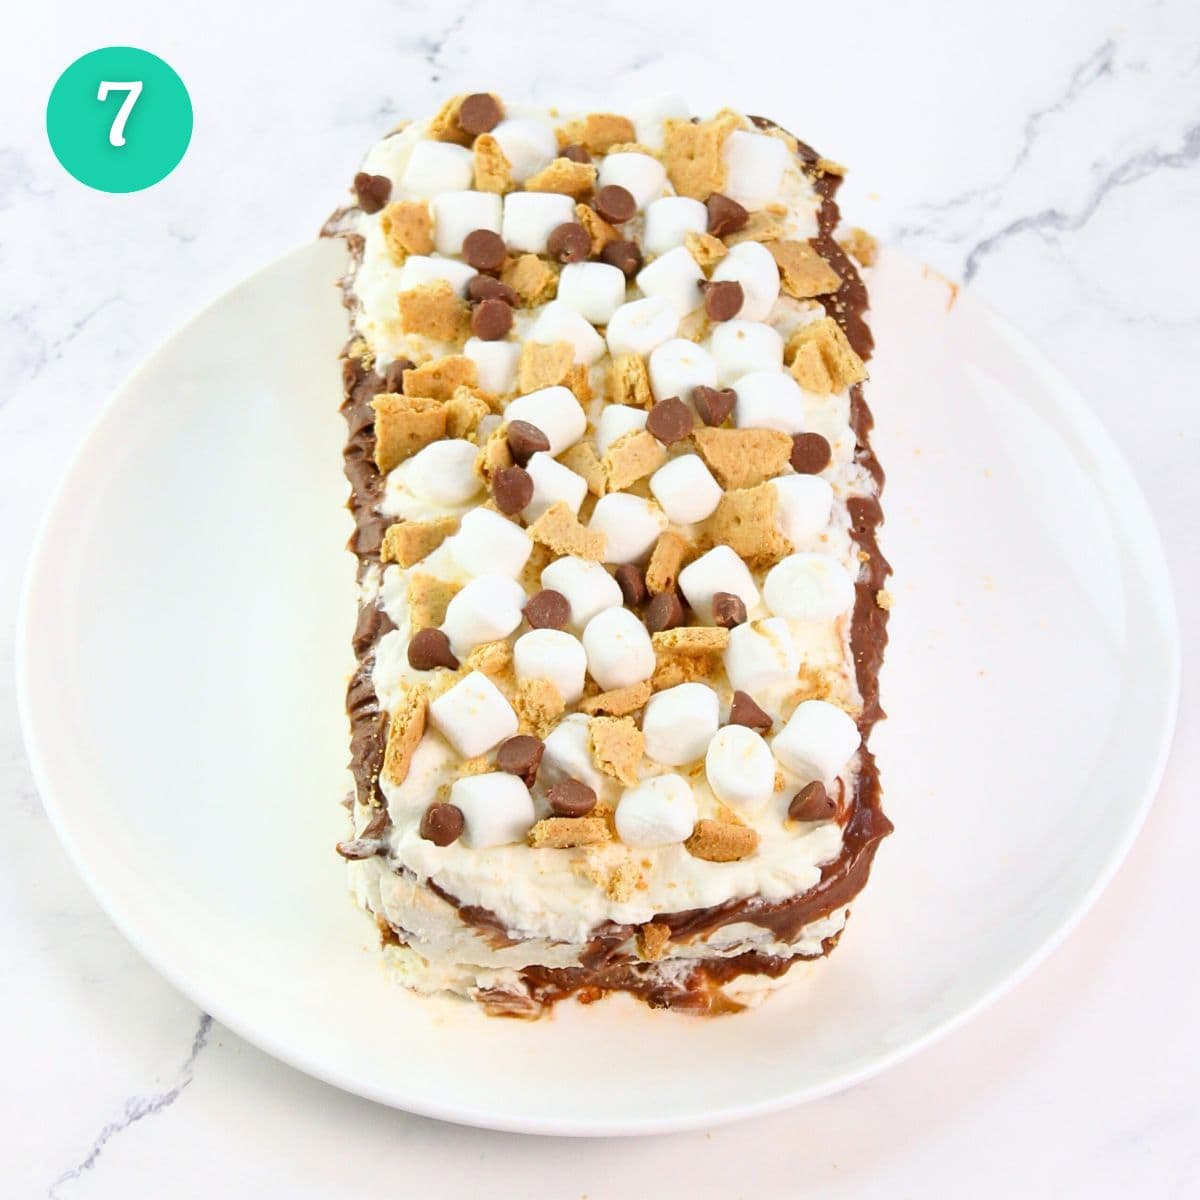
Garnish the top of the cake with mini marhsmallows, broken pieces of graham crackers and chocolate chips.
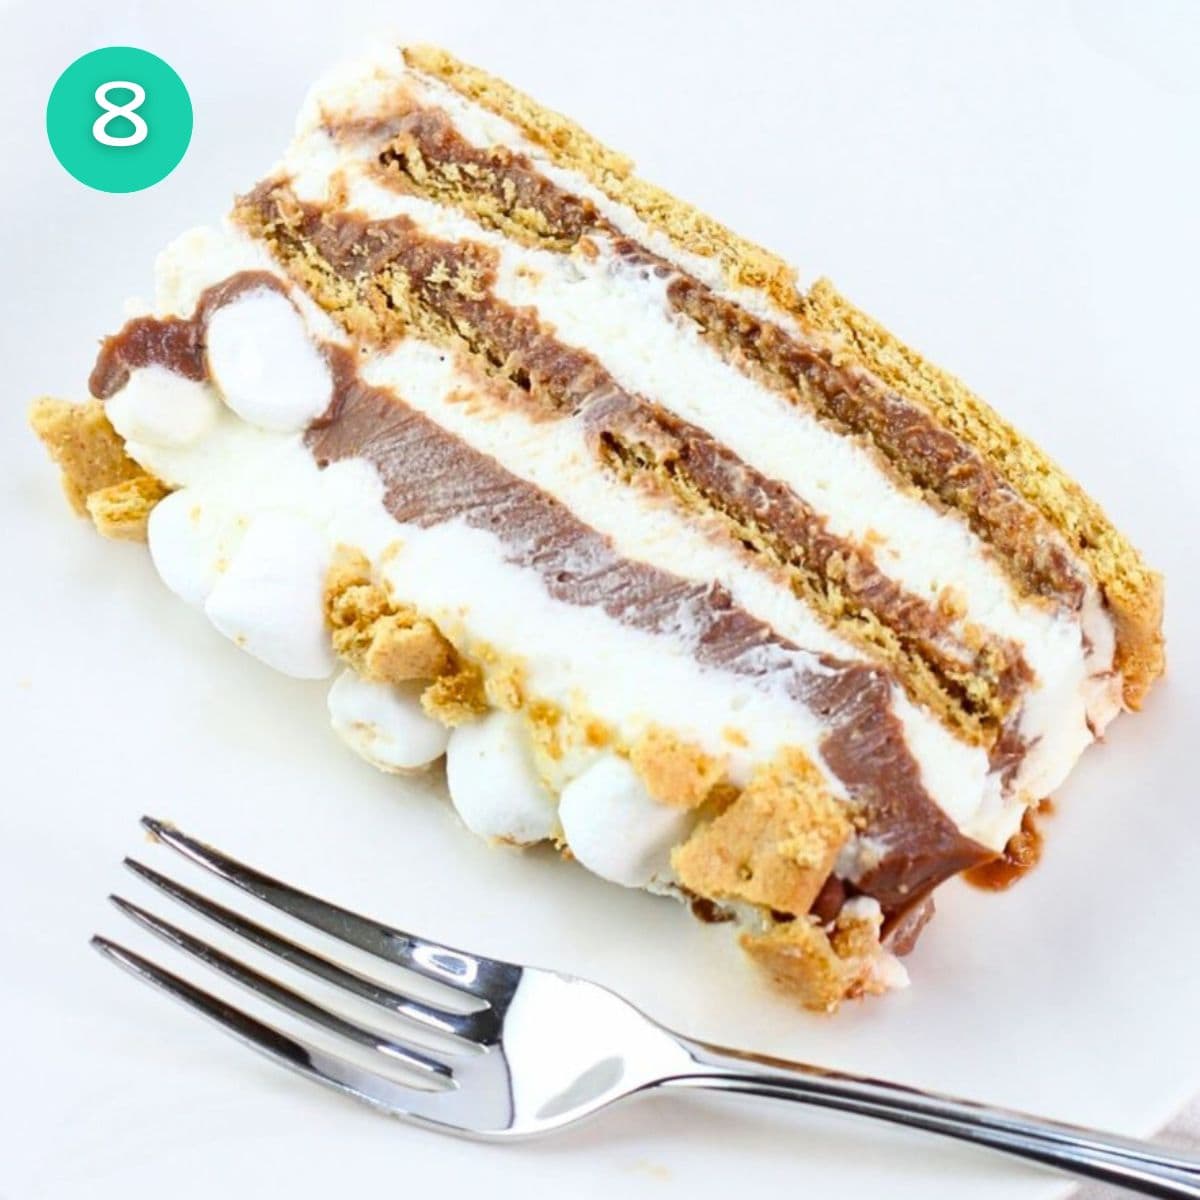
Slice and serve immediately.
Enjoy!
Top Tips
- It's very important to cool the ganache in the refrigerator before adding it to the cake. It's too thin to use when it's still warm (and it would melt the whipped cream), but it thickens up nicely as it cools.
- The graham crackers should be in a tight single layer with no gaps between them, and the layer should go to each edge of the pan. Break up the crackers as needed to fit, and it's okay if they overlap just a bit. If your loaf pan is slightly wider at the top than at the bottom, you may need more crackers in the second, third and/or fourth layer.
- Keep it cold! Serve the cake straight out of the refrigerator so it slices nicely, and return any leftover cake to the refrigerator immediately.
- Rinse and dry your knife after each slice to make the cleanest cuts possible.
Storage
Store any leftover cake in the refrigerator, covered, for up to 2 to 3 days. After that, it can start to break down and get watery. It's best to enjoy it sooner rather than later!
I hope you try this S'Mores Icebox Cake recipe and love it as much as I do. Thanks for visiting today!

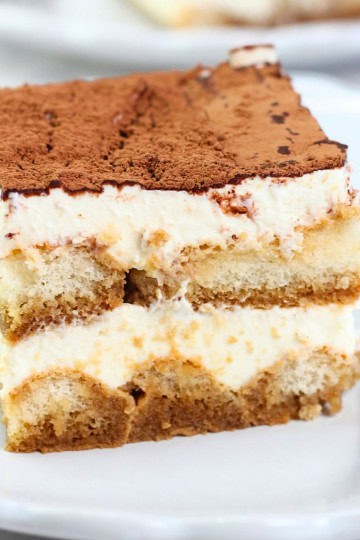
More Easy No-Bake Dessert Recipes to Try


Want more desserts?
Check out my Dessert & Sweet Treats Recipes page!
If you make this recipe, I'd love to know how it went. Please leave a star rating and comment below. Thanks!
📋Recipe

S'Mores Icebox Cake
Ingredients
For the Chocolate Ganache
- 2 cups milk chocolate chips, plus 1 tablespoon extra for garnishing the top of the cake
- 1 cup heavy whipping cream
For the Marshmallow Whipped Cream
- 1½ cups heavy whipping cream, cold
- ¼ cup powdered sugar
- ½ teaspoon pure vanilla extract
- 1 (7.5-ounce) jar marshmallow fluff
Remaining Ingredients
- 9 full sheets honey graham crackers, see Notes below
- ½ cup mini marshmallows
Special Equipment
- electric mixer (hand-held or stand)
- 8.5 x 4.5 x 2-inch loaf pan (metal or glass); a 9 x 5 x 2.5-inch loaf pan will also work
Instructions
Make the Chocolate Ganache
- Place the chocolate chips in a large heat-proof bowl.
- In a small saucepan, heat the heavy cream over medium heat until it comes to a gentle simmer (don't boil).
- Pour the hot cream over the chocolate chips in the bowl and let sit for 1 minute, then whisk until the chocolate chips are completely melted and the mixture is well-combined and smooth (it will be rather thin at this point, but it will thicken up as it cools).
- Place the mixture in the refrigerator for 30 minutes to cool.Move on to making the marshmallow whipped cream when you have about 10 minutes of the cooling time left.
Make the Marshmallow Whipped Cream
- Place the heavy cream, powdered sugar and vanilla extract in a large bowl. Using an electric hand mixer or a stand mixer with the whip attachment, whip the mixture until soft peaks form (when you pull the beaters straight up out of the thickened cream, it forms peaks that curl over on themselves).To prevent the cream from splattering, I start with the mixer on a lower speed. When the cream starts to thicken, I then turn it up to a higher speed.
- Add the marshmallow fluff. Continue whipping until stiff peaks form (when you pull the beaters straight up out of the thickened cream, it forms peaks that stand up straight and do not curl over on themselves).This can happen quickly, so be careful to not overwhip the cream, as this can cause it to separate and become grainy. Test it often and stop whipping as soon as the stiff peaks start to form.
- Reserve and refrigerate 1 cup of the marshmallow whipped cream for topping the cake later.
Assemble the Cake & Refrigerate
- Line an 8.5 x 4.5 x 2.5-inch loaf pan with plastic wrap, leaving about 3 inches of overhang on each side of the pan so that you'll be able to fold it over to cover the top of the cake later.
- Evenly spread ⅓ of the remaining marshmallow whipped cream (about 1 cup) in the bottom of the pan.
- Cover the whipped cream with a single layer of graham crackers, going all the way to the edges of the pan and leaving no gaps in between the crackers (break them into pieces as necessary to fit; it's okay if they overlap a bit).
- Spread ⅓ of the cooled chocolate ganache (about ½ cup) evenly over the marshmallow whipped cream, going all the way to the edges of the pan (do this gently, as you don't want the two layers to combine).
- Repeat the layers 2 more times: marshmallow whipped cream, graham crackers, chocolate ganache, marshmallow whipped cream, graham crackers, chocolate ganache. Finish with another layer of graham crackers.If your loaf pan has slightly angled sides and gets wider at the top, you may need additional crackers for the second, third and/or fourth layer to get complete coverage (I needed extra for all but the bottom layer).
- Use the excess plastic wrap to lightly cover the top of the cake. Refrigerate for at least 8 hours (longer is okay; I actually like to let it go for about 12 hours so the graham crackers get even more soft).
Unmold, Garnish & Serve
- When ready to serve, unwrap the top of the cake. Place a serving platter on top of the loaf pan and carefully invert the cake onto the plate. Lift off the pan and remove the plastic wrap.
- Evenly spread the reserved marshmallow whipped cream over the cake and top with the mini marshmallows, broken pieces of graham crackers and chocolate chips.
- Slice and serve immediately while still cold. Enjoy!
Notes
- I used Honey Maid graham crackers. Each full sheet is approximately 5 x 2¼ inches and has 4 crackers. I used 9 full sheets total (3 individual crackers were left for topping the cake). I don't know if all graham crackers are the same size, so if you use a different brand, just make sure you use as many sheets/crackers as you need to do 3 full layers with a few extra crackers for the top.
- Keep it cold! Serve the cake straight out of the refrigerator so it slices nicely, and return any leftover cake to the refrigerator immediately.
- Rinse and dry your knife after each slice to make the cleanest cuts possible.
- Store any leftover cake in the refrigerator, covered, for up to 2 to 3 days. After that, it can start to break down and get watery. It's best to enjoy it sooner rather than later!
- Estimated calories shown is based on 10 servings.
Leave A Comment