
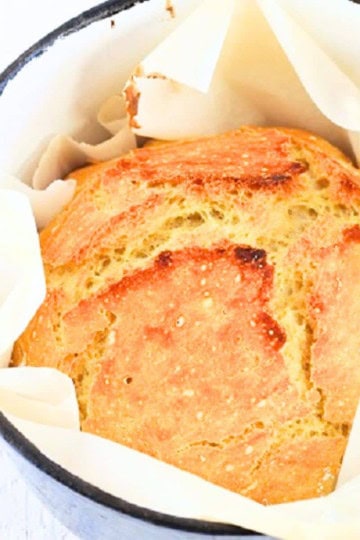
This Easy Homemade Half Whole Wheat Bread recipe gives you a soft yet sturdy loaf of delicious bread that's easy to slice and is perfect for sandwiches and toast!

Jump to:
Want to make some fabulous homemade sandwich bread? This super simple 50/50 white and wheat bread hybrid is my go-to recipe. It turns out awesome every time!
I love baking homemade bread - not only because it's so delicious, satisfying, and makes the house smell amazing - but also because I often wonder what's lurking in that sliced bread we get at the grocery store.
I mean, when I make homemade bread, it lasts about 2 to 3 days - tops - before it gets stale and/or starts to get - you know - fuzzy. Yet that store-bought sliced bread can last for a few weeks without a problem. Hmm...
Besides all that, I also really, really, really want to love all those 100% whole wheat, whole grain, sprouted, no-white-flour-in-sight breads that are supposed to be so much better for you. They're just not my thing, though.
But I still haven't found what I'm looking for (U2!) in a recipe for white sandwich bread. The loaves are either too dense, so soft and fluffy that they smoosh when you slice them, or they get too crumbly when toasted.
Well, move over, white bread, because this half-and-half bread is the answer! The texture is perfect (sturdy yet soft), and it slices beautifully (even thin slices)!
And the flavor? Outstanding! It's ever-so-slightly sweet from the honey and light brown sugar, and you get some of that whole wheat goodness without it being too wheat-y.
It's the perfect wheat bread for white bread lovers like me!

Oh, and by the way, I can't remember where exactly I got this recipe (it's been a couple of years, and I didn't write it down). So if anyone knows where it came from, please let me know so that I can give proper credit. Thanks!
Ingredients You Need
- Water
- Milk
- Vegetable oil
- Honey
- Light brown sugar
- Salt
- All-purpose flour
- Whole wheat flour
- Rapid rise / instant yeast
- Cooking spray
How to Make Half Whole Wheat Bread


Tips & Tidbits
- This recipe uses rapid-rise yeast (also called instant yeast or quick-acting yeast), which allows you to just add it to all of the other ingredients.
- If you want to use active dry yeast instead, you will need to reactivate it first. Change the temperature of the water to 110°F and add the yeast. Let it sit for 5 minutes, and then proceed with the recipe.
- Let the dough rise in a warm place (ideally 75° to 85°F) that is away from drafts. Also, keep it away from your pets (it can make them really sick if they eat it!).
- Rise times given are just guidelines and can vary based on the environment in which the bread is rising (e.g. if your house is cooler, it may take longer than in a warmer house). Always go by the look of the dough rather than the time.
- No stand mixer? Do it the old-fashioned way and knead the dough by hand until it is smooth and elastic, about 10 to 15 minutes. Your arm muscles with thank you!
- You can use either a 9x5-inch or an 8½x4½-inch loaf pan. The 9x5-inch pan will give you a wider, less-tall loaf, while the 8½x4½-inch pan will give you a slightly narrower and taller loaf.
- If you have a bread machine, you can also use that to make the dough. Place all of the ingredients in the bread machine in the order listed and use the "dough" cycle. Once complete, remove the dough from the bread machine and proceed with the recipe.
- I have also successfully run a complete basic bread cycle with this dough in my bread machine, baking and all, and it turned out great!
- This bread freezes beautifully. To freeze a whole loaf, wrap it tightly in plastic wrap and then wrap it in aluminum foil. To freeze slices, wrap each slice individually in plastic wrap and then place the wrapped slices in a freezer bag. When well-wrapped, it should last up to six months.

If you're a beginner bread baker, this is a great recipe to start with!
I hope you try this Easy Homemade Half Whole Wheat Bread recipe and love it as much as I do. Thanks for visiting today!

More Bread Recipes to Try


If you make this recipe, I'd love to know how it went! Please leave a comment and star rating below. Thanks!
📋Recipe

Easy Homemade Half Whole Wheat Bread
Ingredients
- 1 cup warm water (120°F)
- 1 tablespoon milk
- 2 tablespoons vegetable oil
- 2 tablespoons honey
- 2 tablespoons light brown sugar
- 1 teaspoon salt
- 1½ cups all-purpose flour
- 1½ cups whole wheat flour
- 1 (¼-ounce) packet rapid-rise yeast (also called instant yeast or quick-acting yeast), or 2¼ teaspoons if you have a jar of yeast
- cooking spray
Instructions
- In the order listed, place all of the ingredients (except the cooking spray) in the bowl of an electric stand mixer fitted with the dough hook.
- Using the lowest speed, stir until no more dry flour remains, about a minute. If needed, stop the mixer occasionally and scrape down the sides of the bowl.
- Increase the speed to medium and continue mixing until the dough is smooth and elastic, about 3 to 4 minutes. This will not be a very sticky dough. Note: I usually never need to add more flour or water to this dough. After the 3 to 4 minutes of kneading, if the dough is too dry and is not coming together, add water, a tablespoon at a time. If it is too wet and loose, add more flour, a tablespoon at a time.
- Lightly spray a large bowl with cooking spray. Shape the dough into a ball (just do this with your hands without any additional flour) and place it in the bowl. Spray the top lightly with cooking spray.
- Cover the bowl tightly with plastic wrap, and let it rise in a warm, draft-free place until doubled in size, about 1½ to 2 hours.
- Punch the dough down and turn it out onto a lightly floured surface. Using your fingers, shape the dough into a rectangle about 9x11 inches in size. Be sure to press out any air bubbles that you see in the dough.
- Tightly roll up the dough longways, and then pinch the seam together.
- Fold the short sides in onto the seam; pinch all of the seams together.
- Place the dough seam side down on your floured surface and, using your hands, gently shape the loaf by patting in all of the sides until it is a uniform shape and will fit in the pan.
- Spray a bread pan lightly with cooking spray. Place the dough, seam side down, into the pan.You can use either a 9x5-inch or an 8½x4½-inch bread pan. The 9x5-inch pan will give you a wider, less-tall loaf, while the 8½x4½-inch pan will give you a slightly narrower and taller loaf.
- Cover the pan loosely with plastic wrap (you want the dough to be able to rise above the top of the pan), and let it rise in a warm, draft-free place until the dough has risen to 1 inch (no more) above the top of the pan, about 30 to 40 minutes.
- While the dough is rising, preheat the oven to 350°F.
- Carefully remove the plastic wrap from the dough. Bake for 30 to 35 minutes or until cooked through. The loaf should have a hollow sound when you thump the bottom of it (be careful when doing this...that bread is hot!). If you'd rather check the internal temperature, it should be 190° to 210°F at the center of the loaf.
- Immediately remove the bread from the pan, place on a wire rack, and allow to cool completely.
Notes
- Rise times given are just guidelines and can vary based on the environment in which the bread is rising (e.g. if your house is cooler, it may take longer than in a warmer house). Always go by the look of the dough rather than the time.
- No stand mixer? Knead the dough by hand until it is smooth and elastic, about 10 to 15 minutes.
- You can also use a bread machine to make the dough. Place all of the ingredients in the pan in the order listed and use the "dough" cycle. Once complete, remove from the machine and proceed with the recipe.
- If you want to use active dry yeast instead of rapid-rise yeast, you will need to reactivate it first. Change the temperature of the water to 110°F and add the yeast. Let it sit for 5 minutes, and then proceed with the recipe.

KellyB says
I love this recipe. I make it every week now for my family and home daycare. It has turned out every time. I've made breads before but, for some reason this just seems easier and straightforward. Use rapid yeast, put it all in the bowl and mix. I love that it's whole grain but isn't too dense. Thank you for this recipe. I've learned if you don't like crispy crust on top you can rub butter on when it's hot. Otherwise I don't do anything different.
Michelle says
Thank you, Kelly! I'm so happy you love it and make it so often...and butter on top sounds great. I appreciate you taking the time to comment and rate the recipe!
Steph Nielsen says
I’m trying this now. But I thought with rapid rise yeast you only needed one rise. So I’m experimenting to see how it works with only rise.
Michelle says
Hi, Steph! Although rapid rise yeast doesn't require proofing and it can activate and produce carbon dioxide quicker than active dry yeast and result in a faster rising time, it does not eliminate the need for the second rise. The dough continues to develop its texture, structure and flavor during that second rise. Skipping it could result in a more dense and less-flavorful bread. Therefore, I recommend that you follow the recipe as written for the best result. But I'd be interested to find out how your experiment goes!
CRAIG says
OUR GO TO BREAD RECIPE FOR 2 YEARS NOW. THANKS
Michelle says
YAY! Thank you so much, Craig!
Barbara J Wolfsong says
I used maple syrup instead of honey and melted butter instead of oil . . Otherwise the bread was perfect. I could cut it into thin slices for sandwiches and it also made excellent toast. Easy to make and overall a wonderful recipe.
Michelle says
Thank you, Barbara! So glad you enjoyed it and also to know that the maple syrup and butter worked well as substitues for you!
charlene says
I've made so many bread recipes but this one -- the best ever! So easy..... rises beautifully and tastes delicious. My little old mixer couldn't handle the dough, so worked it by hand and it still turned out great. Someone else said they'd also like a reliable recipe for buns -- I need to make some for thanksgiving and would love to give yours a try.
Michelle says
Hi, Charlene! Thanks so much for trying this bread recipe, and I'm thrilled to hear that you like it so much! Sorry that I haven't yet made some buns from this dough so that I can add that as a variation to the recipe. Thanks for the reminder...I'll be putting that back on the top of my to-do list (come back soon and check)! If you'd like to try another bun recipe in the meantime, my 90-Minute Dinner Rolls are reliable and my favorite!
Jean says
This is my all time favorite recipe for bread. I make it in my bread machine which needed to be replaced and now have a Zojirushi 2 lb size. My question is can you help me increase the 1 1/2 lb recipe to a 2 lb recipe which calls for 4 1/4 cups of flour for most recipes? Thank you for any help you can send me and THANK YOU for posting the original recipe - YUM. My husband likes it too!
Michelle says
Hi, Jean! So very happy to hear how much you and your husband enjoy the bread! I will have to work on scaling the recipe and testing it to make a 2-pound loaf, and I will post back here in the comments when I do.
Toni C. says
This did not rise for me, very dissapointing and a waste of my ingrediants. I would NOT make this again.
Michelle says
Hi, Toni...Thanks for trying my recipe! Sorry to hear that your dough didn't rise, but I would encourage you to try it again. I have been making this bread on the regular for years (as have others) without issue. I suspect that there must have been a problem related to your yeast. For example, the yeast was expired or no longer alive for some reason, the water used was too warm and killed the yeast, or the yeast was accidentally not put in (it happens). In addition, as stated in the recipe notes, the temperature in your home could affect the rising time. If it is cooler, this will slow down the process, and it will take longer. Always go by the look of the dough rather than the time. Hope you try again!
Esther says
I made the bread, and it tastes great, but it did not rise when I put it in the pan. Suggestions?
Michelle says
Hi, Esther! If bread dough doesn't rise, it could be any of a few different things. Here are some of the most common reasons: The yeast was out of date or no longer fresh for some reason, the water was too warm (which can kill the yeast), the temperature in the house/kitchen was cool or the dough was in a drafty place (which will cause the dough to rise at a slower rate), it wasn't given enough time to rise (the rising times given in the recipe are just a guideline and may vary depending on the temperature in your house; you have to go by the size of the dough rather than the time). Hope you will give it another try!
Ford says
LOVE this recipe...wondering if you have an adaptation of this to make rolls by any chance (bake time)? Thank you!!
Michelle says
Thank you, Ford! I've never made this bread into rolls, so I don't have the bake time for that just now (but I am thinking maybe somewhere around 15 to 20 minutes depending on the size of the rolls). It's a great idea, though, and I'm definitely going to work on that and, when I do, I'll update the post.
charlene says
I too would like a totally reliable bun recipe given this bread worked out so beautifully!
Michelle says
Hi, Charlene! Please see my response to your other comment above!
Ford says
GREAT recipe, came out perfectly the first time. The instructions were extremely clear, the dough felt lovely (so I had great confidence from the time I set it out to rise) and I super appreciated the tip on final temperature as that specifically allowed me to cook it properly. Thank you!
Michelle says
Thank you for your feedback, Ford...so very happy that you enjoyed the bread!
Tomi says
Could you use almond milk in place of the regular milk? Or just more water as you mentioned in the comment
Michelle says
Hi, Tomi! Yes, you could use almond milk in place of the regular milk. Hope you give it a try!
Tomi says
@Michelle,
Hi! I ended up just using extra water. Turned out great. Will try the almond milk next time! Instructions were very clear. Thank you!
Michelle says
Thanks, Tomi! So happy you enjoyed the bread, and I appreciate your feedback!
Tomi Weber says
Could maple syrup be used in place of the honey?
Michelle says
Yes!
Peggy says
Total 5 star recipe. I love to bake bread. BEST bread recipe I have tried with whole wheat flour. Texture..check.... taste...check...,easy....check ...... perfect!
Michelle says
Thank you, Peggy...I'm so happy you enjoyed it, and I appreciate you taking the time to comment and rate the recipe!!
Barb says
Dough cycle!
Barb says
If using the door cycle on your machine at what point do I pick up the recipe?
Michelle says
Hi, Barb! Once the dough cycle on your bread machine is complete, you would proceed with the recipe by shaping the loaf and following the rest of the steps from there. Let me know how it goes!
Jean says
This my very favorite bread recipe and it turns out perfect every time. I use my bread machine to make the dough and proof it and bake it in the oven. Yum Yum!
My question is - I have been thinking about getting a 3 pound loaf bread machine and would like to know how to increase this recipe to make 2 one and a half pound loafs to proof and finish off in my oven.
Thank you for the original recipe and if possible with an increase in the recipe.
Michelle says
Thank you, Jean! So happy to hear that this is your favorite bread recipe! As far as increasing the recipe, I have found that you can't always just double the ingredients in a yeast bread recipe and expect the same results. For that reason, any time I have made 2 loaves, I have just made the dough for each one separately. You could always try doubling the recipe to see if it works out for you, but I will need to do more research and testing to get you a better answer to your question!
Jean says
@Michelle, thank you for your response to my question. I did buy a 3 lb bread machine. But find very few recipes for a 3 lb dough. I usually just make the dough in my old machine and proof and bake it in the oven since my oven has a proof mode. (cuts down on time and gas).
Thanks again,
Jean